Saturday, February 28, 2009

Thank you, thank you, thank you!

HI all! Happy saturday! I thought it was time to put a little something new on the blog. Saturday mornings are such a great time to play and there is always someone on my list to thank so how about a thank you card? This card uses lots of Hambly Screen Prints paper, rubons and transparencies. LOVE their stuff and Allison at Hambly was extremely generous to a design team I am working with so this thank you was for her. If you have not checked out Hambly yet...run, don't walk :) One thing of particular note was the printed paper that is the background on the card. I inked the edges with SU! dye ink and not only did the metallic finish paper take the ink super well, but it kept it's metallic quality...changing the edge to pink metallic totally made my day! Give it a try, you'll love the way it looks. Have a great weekend and I hope this inspires you to make a thank you card or two today :)

Wednesday, February 25, 2009

February PTI Blog Hop... just fluttering by to wish you a happy spring!

It's blog hop night! Hooray! This card uses the flower image from the Papertrey Ink Honey bees set. I get a TON of use from this adorable set! Also on this card is Paper Pizazz floral printed paper, the butterfly die cut from SU!, crochet lace from an IT! kit studio kit, scallop punch from SU! and a button and sheer ribbon from my stash. The ink is SU! Also, I used pages from my vintage English literature book that I rescued from a doomed fate at the local recycle center. I am hooked on the thin tissue like pages and small type in that book :) Thank you for looking and happy Blog Hop everybody! Woohooo!

Wednesday, February 18, 2009

My oh my what a wonderful day!


WOW! Am I ever excited to share this stationary set!?? Thank you to Papertrey Ink and Nicole Heady for awarding me a Guest Star Stamper spot this month. Such an honor!!


This stationary set was created with my daughter's elementary teacher in mind. She once told me that she actually keeps bees and I just knew the Honey bee set from Papertrey would be perfect for her.


The new Simply Stationary stamp set has several different borders to nestle images or initials in for custom stationary and lots of great single detail images in which to finish off your designs.


This acrylic stationary box is actually a repurposed packaging box that the Papertrey stamp sets are shipped in. I loved being able to reuse this great box. It easily fit 6 notecards and 6 envelopes inside.

The below shot is my pile of supplies I had cut and ready to go using Cricut for the circles and the scallop circles. I used the swiss dots cuttlebug embossing folder to emboss the white cardstock and a Martha Stewert scallop punch for the black scallops. The next step was to stamp everything and then adhere it all together. Designing the layout takes the most time but, once that is done, assembling is a snap! I will definitely recreate this layout in the future.
Thanks so much for stopping by and looking :)

Supplies

Cardstock: Papertrey Ink Lemon Tart, SU! basic black and unknown white

Stamps: Papertrey Ink HOney Bees and Simply Stationary

Ribbon: Papertrey Ink

Ink: SU! Barely Banana and Stazon Black

Embossing folder: Cuttlebug swiss dots

Cricut cartridges: Mini Monogram cartridge

Punch: Martha Stewert

Sunday, February 15, 2009

A man card..

*gasp*! A card that is for once, NOT pink OR sparkley! hee hee... Whipped up a card for a family friend and went to town with some browns and kept it simple.


This card uses PTI cardstock, SU! glossy cardstock and ink from SU! and staz on. My SU! demo showed us how to sprinkle a few dots of die ink on glossy cardstock and brayer it on until the edges just begin to mix. THat created the sunrise looking background behind the ducks. ONce dry, I stamped the ducks and reed images with black staz on ink. The main duck image was colored with brush pens by Zig to pump up the details and the edges of the card and the glossy cardstock were all sponge inked with brown ink as well. The envelope is a standard business sized security envelope dressed up reed and goose stamps. The images are all SU! Thanks for looking :)

Saturday, February 14, 2009

Dawn's Favorite color challenge from PTI

EDITED: I feel like the luckiest girl! THank you Papertrey Ink and Dawn for the amazing Damask set and for all the opportunities to enter and win during your anniversary celebration! You gals are amazing!!!

I was inspired by Dawn McVey's pink and orange card for this challenge. While those colors are not much of a departure from my usual style...I did venture out to try a more shabby approach to these bright colors. I aspire to be better at shabby and vintage and I was happy with the way this card combined a little of me and hopefully a little shabby too! What do you think? I started with Sizzix diecut flowers from a vintage book I have for just this purpose. The pages are nice and thin and make nice fluffy flower layers. I stamped them with Only Orange, Pink Passion and Creamy Caramel SU! inks. The stamp sets are from PTI...polka dot basics and simply stationary. The little bee and the "happy" are from PTI Honey bee set and the "birthday" is from SU! I inked and layered the die cut flowers and topped them off with a button. The leaves are white cs and then stamped with the simply stationary detail stamp and then inked as well. The flower stem was first paper pierced and then sewn with hot pink twistel. The scallop edge punch is from SU!

Thanks for looking!


Happy valentines day ---I wuv you! woof woof!

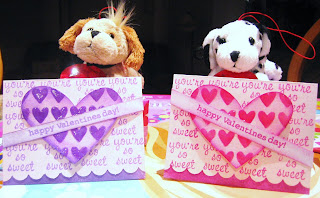
Just one last valentines day offering. A late night wrapping and card making session for my girls last night. The tiny dogs, when squeezed, say I wuv you, woof woof! Sure to make 2 little girls day a little sillier...if that's even possible. :) The cards are stamped with a studio G acrylic stamp that says "you're so sweet". The "happy valentines day" sentiment is from Papertrey ink...the love songs set. The scallop punch is SU! The die cut heart is from the doodlecharms cricut cartridge. I dressed it up with the tiny heart mask I made by cutting the heart paper clip detail from fabulous finds over and over again. It made a perfect mask for making rows and rows of inked hearts. And just for fun and because I like to torture myself with glue drying time ;), I put crystal effects over the top of each little heart. Made them look good enough to eat!


Thursday, February 12, 2009

This is dedicated to the one I love

Happy *almost* Valentines Day! So I know Valentines Day is completely a retailer's holiday but, what can I say? I am a sucker for all the pink and red and hearts and glitter in the holiday aisles this time of year. I am also very lucky to be married to the man of my dreams :)


I made this card for our last anniversary actually but you all have already seen this year's valentine's card below so here is another dose in honor of love! The adorable Love You paper is from KI...is was the last chunk I had left from a scrapbooking project. The Love diecut is cricut and the writing and doodles are my own using a Marvy Uchida Puffy velvet pen. If you haven't tried these, they are very fun! You write or color with it and heat it with a heat gun and watch the puff magic happen before your very eyes! Sometimes these pens are located near the fabric paints and markers and such. Keep an eye out and give them a try.

Have a pink sparkly valentines day everyone!

Monday, February 9, 2009

Friends til the end challenge


Here's my card for the friends til the end challenge. I used a cuttlebug dots embossing folder and then sanded a bit to reveal the white core of the paper. The stamped sentiment is a Studio G $1 stamp from Michaels. I think sending a friend a card is a fantastic idea and I do it as often as I can. :) thanks for looking...

Friday, February 6, 2009

PTI Bitty Dots Puzzler Challange


Here's a favorite card that was for a very favorite person! Maybe it will bring me good luck for the PTI sketch challenge :) Instead of the 3 dots/embelishments in the sketch I have adorable honey bee ribbon that I had in my stash. The stamp set is a SU! set from 2008 I think! TFL!

PTI cardstock sampler challenge


One more project thanks to all of the cool giveaways at Papertrey Ink! In celebration of the new paper sampler packs coming out, PTI is giving away a years worth of cardstock!! We were challenged to use Pure Poppy, Summer Sunrise, Ripe Avocado and Ocean Tides.
Supplies:
Stamps: PTI Around and About Sentiments
Ink: PTI Ocean Tides, SU! Real Red, Kiwi Kiss, Apricot Appeal
Punch: CM
Stickles and MS glitter
EDITED to add: My straight stamped lines are due to two things: luck and the fact that these are acrylic stamps and that helps when lining them up. A stamp positioner would make them even better but I was getting good results by eye so I stuck with it! Thanks for asking...

Wednesday, February 4, 2009

It's in the bag!

Hi all! Just a little treat bag dress up to share. This is what my girls will be making to take the valentine treats to their friends this year. Well, they'll be doing their own stamping and color choices but here is my version. The treats are contained in the clear lollipop bags by Wilton. Any bag 2x3 inches or so would work. To dress up the clear bags, I made up a wrapper with a matchbook style closure that is stamped with the adorable images from Papertrey Ink. This is the Love Songs set. LOVE it! To start, I cut a 3x10.5 strip of white paper. Score it a 4 inches 5 1/2 inches and 9 3/4. The first four inch panel will be the front of your packaging so you will want to make sure anything stamped or added here will be face up once it is closed. The scallop circle punch from SU! makes a great window and if you punch from the side of your cardstock, it reaches the horizontal center once you feel the carstock edge stop the punch from going any farther in. Convenient! and a nice surprise :) Stamp and ink you front panel. Fold and staple the top flap and stamp the Happy Valentines Day sentmient. I added some punched paper scallop (punch by Martha Stewert) to the edge of the flap just for fun but it's not needed to hold the wrapper closed. Finally I stamped the circle/heart topper tag and adhered it over the staples for a more finished look.
Fill your treat bag with candies and tape it to the inside of your wrapper up under the top flap. Finish folding the wrapper at the previously scored marks so your treat can stand on it's own and tuck the front panel under the flap. Ta da! Totally cute and handmade wrappers!!! My kids love to stamp (ages 8 and 5) and they can't wait to get started on their own version of these this weekend. Happy hearts day!!!