Greetings! I have something new and FUN to share today. I recently shared that I was asked by
Kelleigh Ratzlaff to be a part of her creative team working with her super cute digital templates. Being the DOLL that she is, she referred lil ol me to Nicole Seitler, who runs
the Digi Chick Boutique, and told Nicole "we have to have Dana at the THC". Being the digi know not-so-much that I am, I asked Kelleigh "what is THC?" . Wellllll, THC stands for
The Hybrid Chick. It's a brand new arm of the Digi Chick and it's a place especially for those of us who like to use and try digital elements but GOTTA still play with the actual paper, scissors and glue. There are great tutorials at the Hybrid Chick contributed by the creative team as well as contests and giveaways. Guess who is now also a part of the Hybrid Chick team? I know! Can you believe it?! By the way, there is a spot on the sidebar over at THC where you can submit your work for creative team consideration and there is a darling digi paper set to download for FREE also on the sidebar of the site. No excuse not to try it out right? Ch-ch-ch-ch-Check it out!
OK, now on to the project. Oh happy day indeed! I broke open a freshly downloaded digi kit from
Mira Designs called
Happy Land. It is packed full of fun papers and elements but I have to say the houndstooth paper alone was worth the price of admission for me LOL! I have a small addiction to houndstooth these days and now I own it in digital format so I can shrink it, grow it, re-color it and print it forever and ever! And just a quick reminder, I am not a user of any program fancier than Microsoft Word for my hybrid projects so it's pretty easy to get the basics from your kit.
 For my project, I chose Kelleigh's super cute hexagon box template. A quick download and I was ready to go. I opened the line image of the template in Word and started playing. I first enlarged the template to the very edges of my paper. This causes the template to be a bit too long for an 8 1/2 x 11 sheet of paper but that was ok since I wanted to make some alterations anyway. I wanted to make the top a lipped piece versus one that tucks inside. So I printed the top at full size and then printed the bottom a tiny bit smaller to enable the on and off the top was going to need. I printed off the two sections onto copy paper as well as printing out a full sheet of houndstooth paper. While my printer will accept cardstock, I don't like cut and fold lines printed on my project so I opt to print the template on a seperate sheet, staple it to my printed paper and then cut out the two sheets at the same time. Before I cut out the bottom of the box template, I scored 1/4" score lines vertically on a sheet of SU! shiny cardstock. Then same procedure, staple the template and cut. Kelleigh includes a how to assemble with each template complete with photos to help you along. I scored according to the template and adhered everything together.
 Here she is! A sweet little box for a very special friend of mine who is getting married in a month. I decided I would fill this box with tiny emergency items that she just might need, just in case, on her big day.
 This is a great shot of how I chose to finish off my box. I wanted this box to be sturdy enough that she can toss it in with her stuff that day. I decided a few reinforcements were justified and made a simple box liner by cutting, 1/4" scoring and punching a decorative edge along a piece of pink cardstock. The liner was 2" x 12", then edger punched. It's not quite enough to cover all six sides so I cut one more piece to finish of the last section. I also added top edge tabs to the bottom of the box so that instead of cut edges, they are now folded and adhered tabs...again for the reinforcement factor.
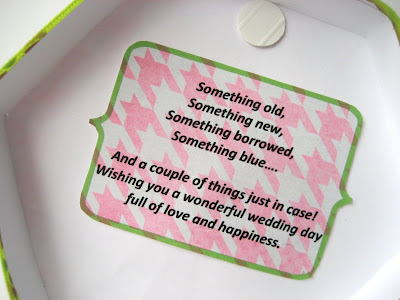 A close up of the note I wrote inside the box for my friend. This was done in Word again using a text box and adding the bracket and rounded corner box shapes. I printed this over a scrap of the houndstooth I had left over. A couple of notes on the photo below....the "happy day" elements are part of the Happy Land digi Kit and were simply re sized and printed on a scrap of white cardstock through Word. The accordian flower is a 1 " x 11" strip of shiny white cardstock scored at 1/4" and accordian folded. The edges were glittered with antique silver glitter from Martha Stewert. And the lime green vellum....actually white vellum run through the sizzix with the swiss dots embossing folder and then colored on the back side with a lime colored brush pen. Head on over to the cupcake project to see more with colored and dry embossed vellum.
 Some of the goodies I have inside the box. I shopped the travel aisle for some things, an emergency kit for others and also added an emergency "something blue" for luck :) Again, scraps pf the houndstooth are great for repackaging loose items.
 A small discussion on the box closure. Again, keeping in mind I wanted this box to be able to survive the rigors of the big day, I opted for a magnet closure flap. If you have ever wondered why Basic Grey sells magnets....when you try them out and hear the "snap" when they find each other, you will know. The one downside is the adhesive...it's no match for the pull of the magnets. Thanks to some crafty techniques shared by my friend Elise, we found that the magnet works best when encased, or taped down when it's out of site. Check out her FABULOUS interactive card with the yummiest clear star clasp that you have ever seen using these magnets {here}.
 For my clasp, I punched two half inch circles from the scored white paper. I also punched a strip of the houndstooth and pulled out a tiny silver brad and a gem. The gem was tinted with alcohol ink to match. The Basic Grey magnet is sandwiched between circle and houndstooth tab and circle, all glued with Scotch quick dry liquid adhesive.
 For the lid hinge, I simply adhered a strip of scored white cardstock to the inside back section of the lid to the outside back of the box and made a crease at the fold.
 And FINALLY, one last shot to show how much class a bit of scoring gives plain cardstock. I love the ridges in the shiny white cardstock. Seems very "boutique" to me.
Oh and don't forget, FINAL chance to leave a comment for my blog candy for 3 gift certificate winners to Kelleigh's store. Check out the post {here}. Don't miss out and good luck!

Thanks so much for stopping by. I appreciate you sharing your time with me!
Supplies:
Cardstock: Georgia Pacific and Stampin Up!
vellum: unknown
embossing folder: cuttlebug
punches: stampin up!
scallop scissors: fiskars
glitter: martha stewert
chipboard heart: MM
paint: delta
alcohol ink: ranger celery
magnet: basic grey
scor pal
Other: ribbon, craft gem, tulle, spray adhesive, small silver brad


 I instantly was drawn to the woodsy theme of many of the images on this inspo picture. Anyone out there remember Woodsy the Owl? Give a hoot, don't pollute guy? Well, here's a great little modern Woodsy from Recollections at Michaels paired with some Target $1 aisle cork letters and fun embossing.
  Isn't he just a make you smile kind of owl?
 You definitely don't want to miss what the My Time to Create Team has put together for you this week. Check them out :)


